Install an Electric Garage Door Opener
It’s the summer packed full of Do-It-Yourself projects! DIY home projects are very helpful in becoming a responsible, knowledgeable homeowner. Then you’ll be the handy, helpful neighbor on the block! Next on the list, your garage door opener.
The garage door opener is a device that is hard working without us realizing it. But when it stops working, we notice. Fortunately, once you’re familiar with the parts of a garage door opener, installing one is easy! If you have any questions, contact Overhead Door Company of Garden City!
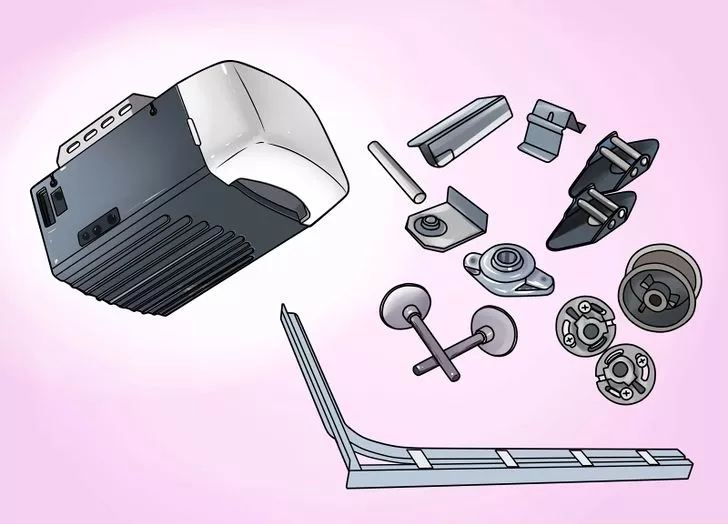
Before you start the installation, lay out all the parts that came in the opener box. Double check you’ve got everything you need. Better to find a missing part now, rather than in the middle of installation.
- Put together the main assembly. The opener should come with detailed instructions on how to do this.
- Put the rail together. It usually comes in three pieces that slide together and lock in place very easily.
- Then slide the trolley over the rail. The trolley is the piece that moves along the rail, pulling the door open. Usually comes in two pieces — an inner and outer piece.
- Attach the rail to the motor.
- Install the pulley at the end of the rail, opposite the motor compartment. Attach the end of the belt, screw, or chain to the trolley.
- Attach the header bracket to the front wall of the garage. Using a level, determine the highest point of travel for the garage door, measure two inches above, and install the bracket there.
- Next, install the rail into the header bracket. Line up the holes so the pin can be easily pushed through.
- Install blocking on the ceiling, if there currently isn’t any. Check your instruction manual for detailed steps. Important: be sure you’re attaching the blocking to joists, the parts of the ceiling with solid wood, and not just the drywall — this may require a trip to the attic.
- Lift the motor and connect to backing and brackets. There are different holes, depending on where your motor and brackets line up.
- Attach a bracket to the door. This is the bracket that will connect the door to the trolley. You may have to drill holes in the door if there are not already holes, they should be 2”-4” below the top of the door.
- Connect the trolley arm to the trolley and door.
Finally, install any optional safety features included with the garage door opener: emergency release rope, light bulbs, safety sensors, etc. You can install one, all, or none of them.
Installing a garage door opener may be a task that takes a couple hours, but you’ll be glad you did it! It can be done on your own, but a helper is always useful!
Overhead Door Company of Garden City is available for any questions you may have during the installation process! And if you’d like us to take care of the installation for you, give us a call 620-275-4602 or contact us for a service appointment.

